
Conversions API (CAPI)
Learn how the Conversions API connects marketing data with Meta and how CAPI can be configured for lead progression signals.
Introduction
The Conversions API lets you send useful marketing and customer-action information to Meta from sources such as a website, mobile app, business messaging, or offline records. Meta can use these signals to improve ad delivery, measure results, and help reduce the cost of acquiring results.
One connection can carry different event types, which can reduce the need to maintain separate integrations for every source. With a direct integration, the advertiser’s server sends the events to Meta’s Conversions API.
Server events are associated with a dataset ID and can be used for reporting, measurement, and ad optimization alongside signals from other Meta-supported channels. Offline events can also be used for offline measurement and custom-audience activities.
How CAPI works
Place a CAPI node at the stage where you want to send a signal—for example, after a customer replies, shows interest, or completes a qualification step. Each node tells Meta the stage that the lead reached. This gives you filtered lead data based on progression and qualification depth.
Meta can use these signals to optimize ad delivery toward people who resemble higher-intent or completed/qualified leads, rather than treating every engagement as the same.
Where CAPI is available
You can use CAPI in Lead Journey automation and as a chatbot node under Utility.
Add CAPI to a chatbot
When a customer shares details such as an email address, phone number, or other information through the chatbot, you can use CAPI to collect those values and send them to Meta with the selected event.
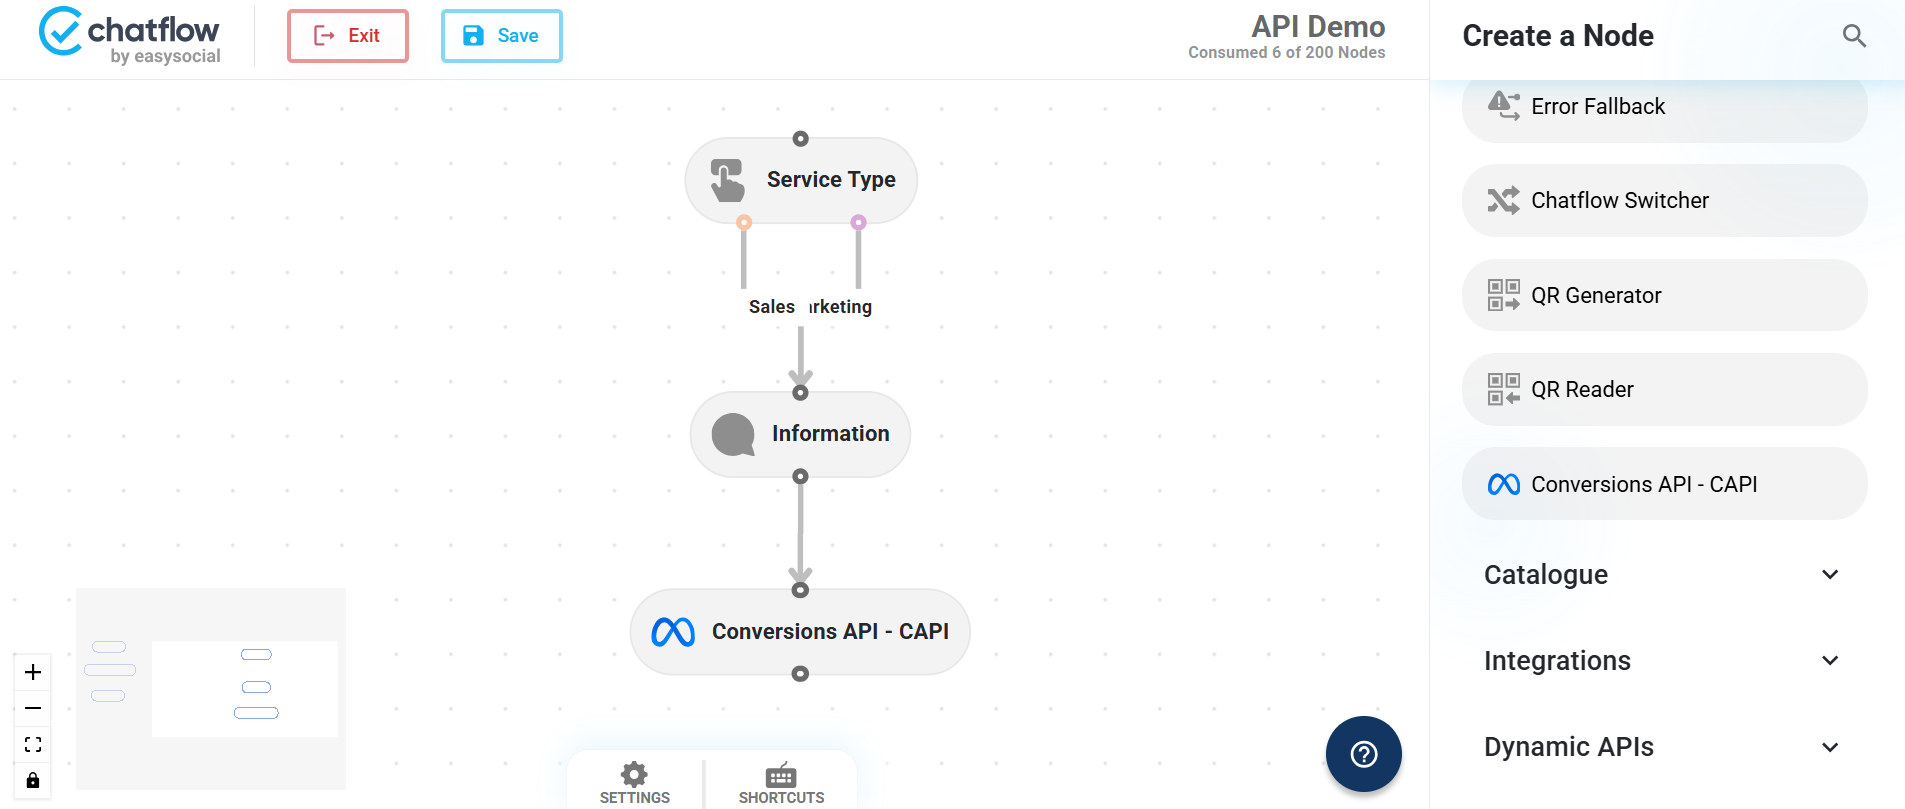
- Open the chatbot flow in the Chat Flow builder.
- Right-click in the flow, open Utility, then select Conversions API - CAPI.
- Place the node at the point in the flow where you want to send the conversion signal. Connect it to the relevant part of the chatbot flow.
- Select the CAPI node to open its settings.
- Choose the Event Name and Action Source for the signal.
- Use User Data Fields and Custom Data Fields when additional event data is needed. Select Add Field in the relevant section and use a dynamic replacement such as
[email]or[first_name]where required. - Repeat the process at later points in the flow when you want to send signals for additional customer actions or stages.
Use CAPI in a Lead Journey
Create the journey first from the Build Journeys page. Add stages for the lead’s progress, then select CAPI under the stage’s Automations options. You can add CAPI to each stage where you want to report progress. Continue with Configure a CAPI node to choose the event, action source, and data for that stage.
- Open the Build Journeys page and select New Journey.
- Complete the journey details, continue to the stages, and add the stages that represent the lead’s progress.
- Open the automation settings for the required stage and select CAPI.
- Continue with Configure a CAPI node to set the event, action source, and data to send.
Configure a CAPI node
When you add a CAPI node, configure the event, the source of the action, and the data you want to send with the event.
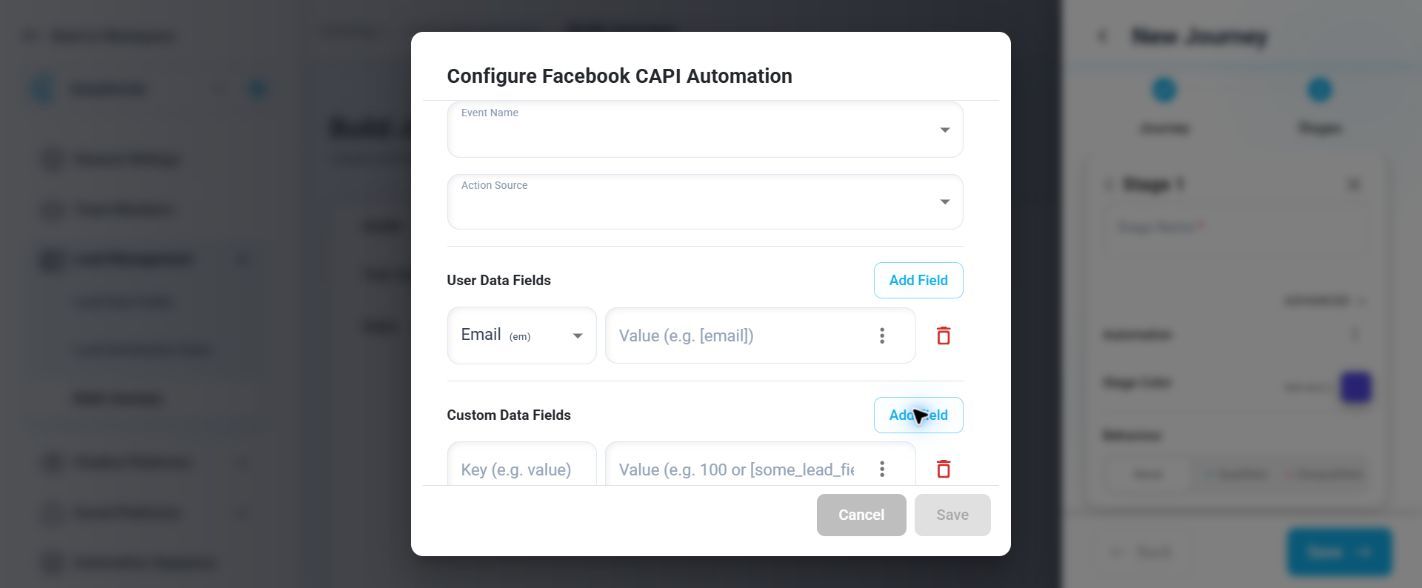
| Setting | Options or fields |
|---|---|
| Event Name | PageView, ViewContent, Search, AddToCart, InitiateCheckout, Purchase, Lead, CompleteRegistration, Subscribe, or Contact. |
| Action Source | email, website, app, phone_call, chat, physical_store, system_generated, business_messaging, or other. |
| User Data Fields | Add a field and enter its value. Available field types include Email (em), Phone (ph), First Name (fn), Last Name (ln), Date of Birth (db), Gender (ge), City (ct), Country (country), State (st), Zipcode (zp), ig_sid, ig_account_id, ctwa_clid, page_scoped_user_id, page_id, madid, lead_id, subscription_id, fbp, fbc, client_user_agent, and client_ip_address. |
| User Data value | Enter a fixed value or a dynamic replacement, such as [email] or [first_name]. |
| Custom Data Fields | Add a custom key and value. The value can be fixed or a dynamic replacement such as [some_lead_field]. |
Use a CAPI node at the stage that represents the lead signal you want to share with Meta. For any further assistance or issues, please feel free to WhatsApp us at +91 7229970970. Our team will be happy to assist you.