
Lead Data Fields
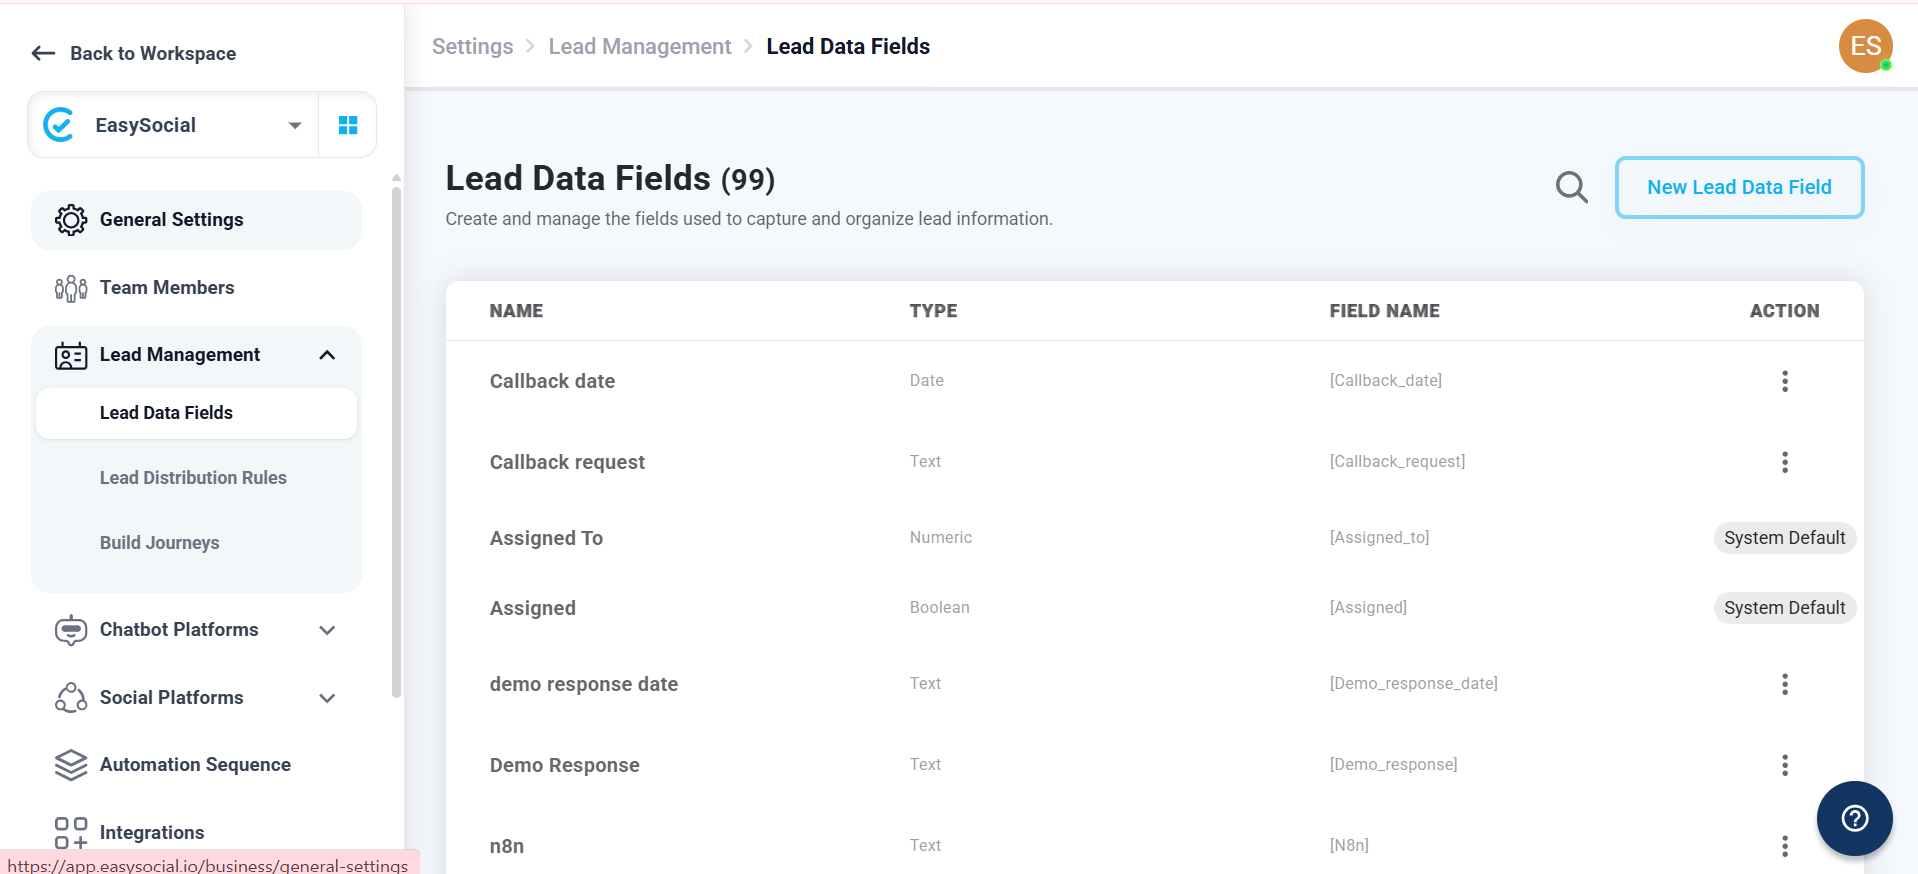
Lead Data Fields let you decide which customer information should be saved with a lead. EasySocial includes some system-default fields, and you can create additional fields from this page or while building a chatbot.
Lead Data Fields list
Each row shows the field’s display name, data type, field name, and whether it is a system-default field. Select New Lead Data Field to create a field for information that is not already available.
Where the fields appear
Lead Data Fields can be viewed in Contacts and used in Chat filters. In Chat filters, the available lead fields appear as filter options. In Contacts, the fields appear as columns, and a contact’s saved value is shown in the relevant column.
Create a lead data field
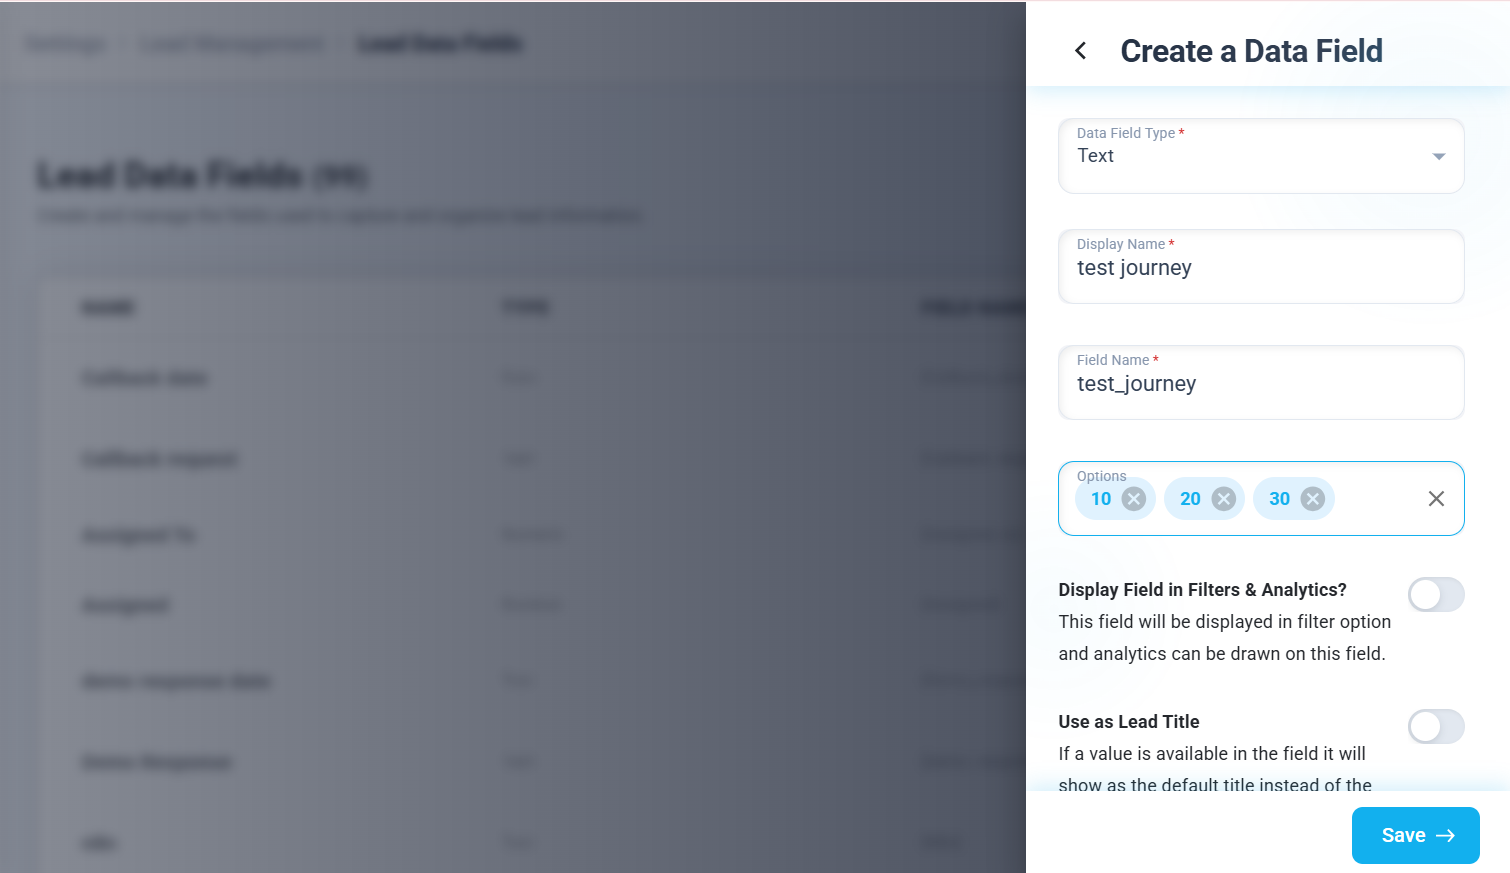
When you create a field, choose the type of information it will store, give it a label that users can understand, and configure how it can be used. The fields marked with an asterisk in the form must be completed.
Data Field Type
Choose the kind of value the field will store. The available types are Number, Text, and Date. Choose the type that matches the information you plan to save so the value is stored in the appropriate format.
Display Name
Enter the name that users will see when they view or use this field. Use a clear label that describes the customer information, such as Preferred Contact Date or Budget.
Field Name
This is the internal name used for the field. It is filled automatically from the Display Name, but you can change it to a name that suits your needs. When the Display Name contains spaces, those spaces are changed to underscores automatically; for example, test journey becomes test_journey.
Options
Use Options when one field needs a defined list of choices. Add each choice as a separate tag in the same field. For example, a field for selecting the person assigned to a lead can contain separate tags for the available team members. These choices can then appear when you filter leads by that field.
Display Field in Filters & Analytics?
Turn this on when you want the field to be available in the Chats filter tab and used for analytics. Leave it off when the field should be saved with the lead but should not appear as a filter or analytics field.
Use as Lead Title
Turn this on when the value saved in this field should be used as the lead title. For example, if the field stores the city mentioned by the customer, the lead can be shown with that city as its title.
Save the field
After entering the field details and choosing the required settings, select Save. EasySocial then adds the new field to the Lead Data Fields list so it can be used to store the selected customer information.
Choose a clear Display Name and the correct Data Field Type before saving.