
Easy Social Sign Up: How to Access WhatsApp Business API
Signing in to Easy Social
Introduction
Easy Social is a platform designed to simplify business communications through WhatsApp API. How to Create an Easy Social Account and Get Access to WhatsApp API
Before you can access the WhatsApp API, ensure you have the following:
-A Government-Registered Business with a GST Certificate, though registrations like MSME or Udyog Aadhaar may also be considered.
- A Facebook Account (required for Business Manager).
- A Website for your business.
- A Phone Number that is not linked to any existing WhatsApp account.
Step-by-Step Guide to Getting Started
Step 1: Creating an Easy Social Account
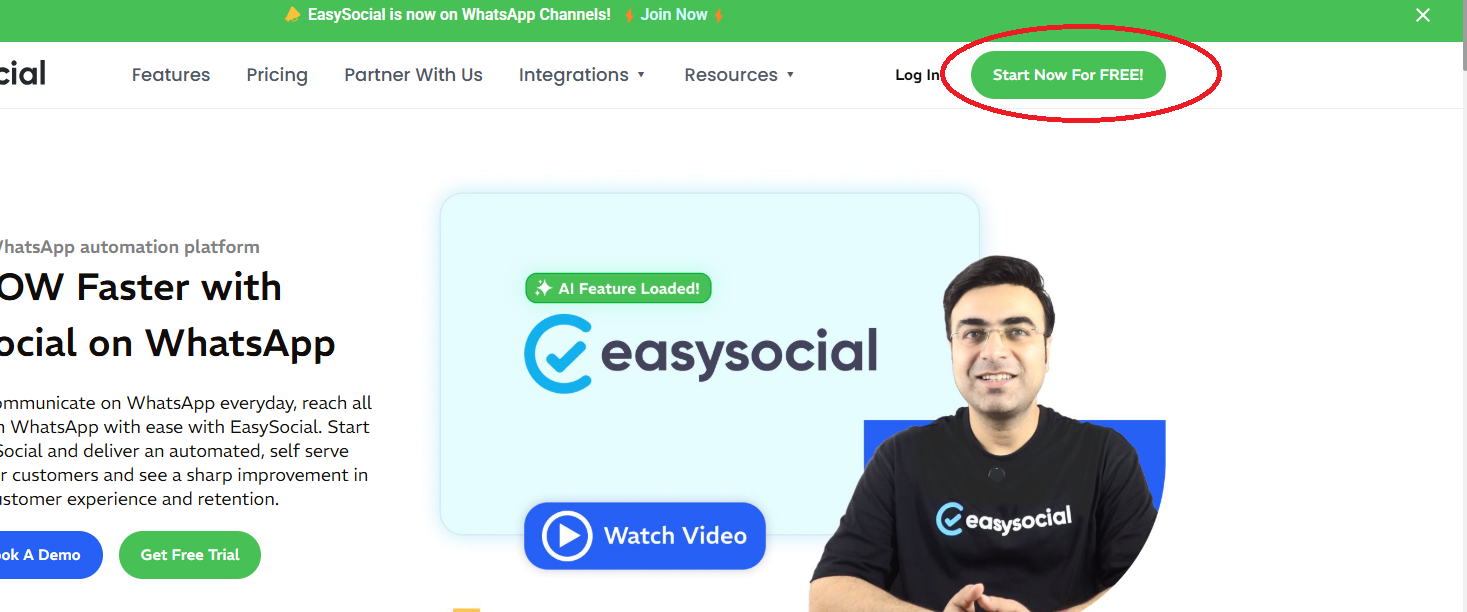
- Go to the Easy Social official website easysocial.io.
- Click on the Start Now For Free! button.
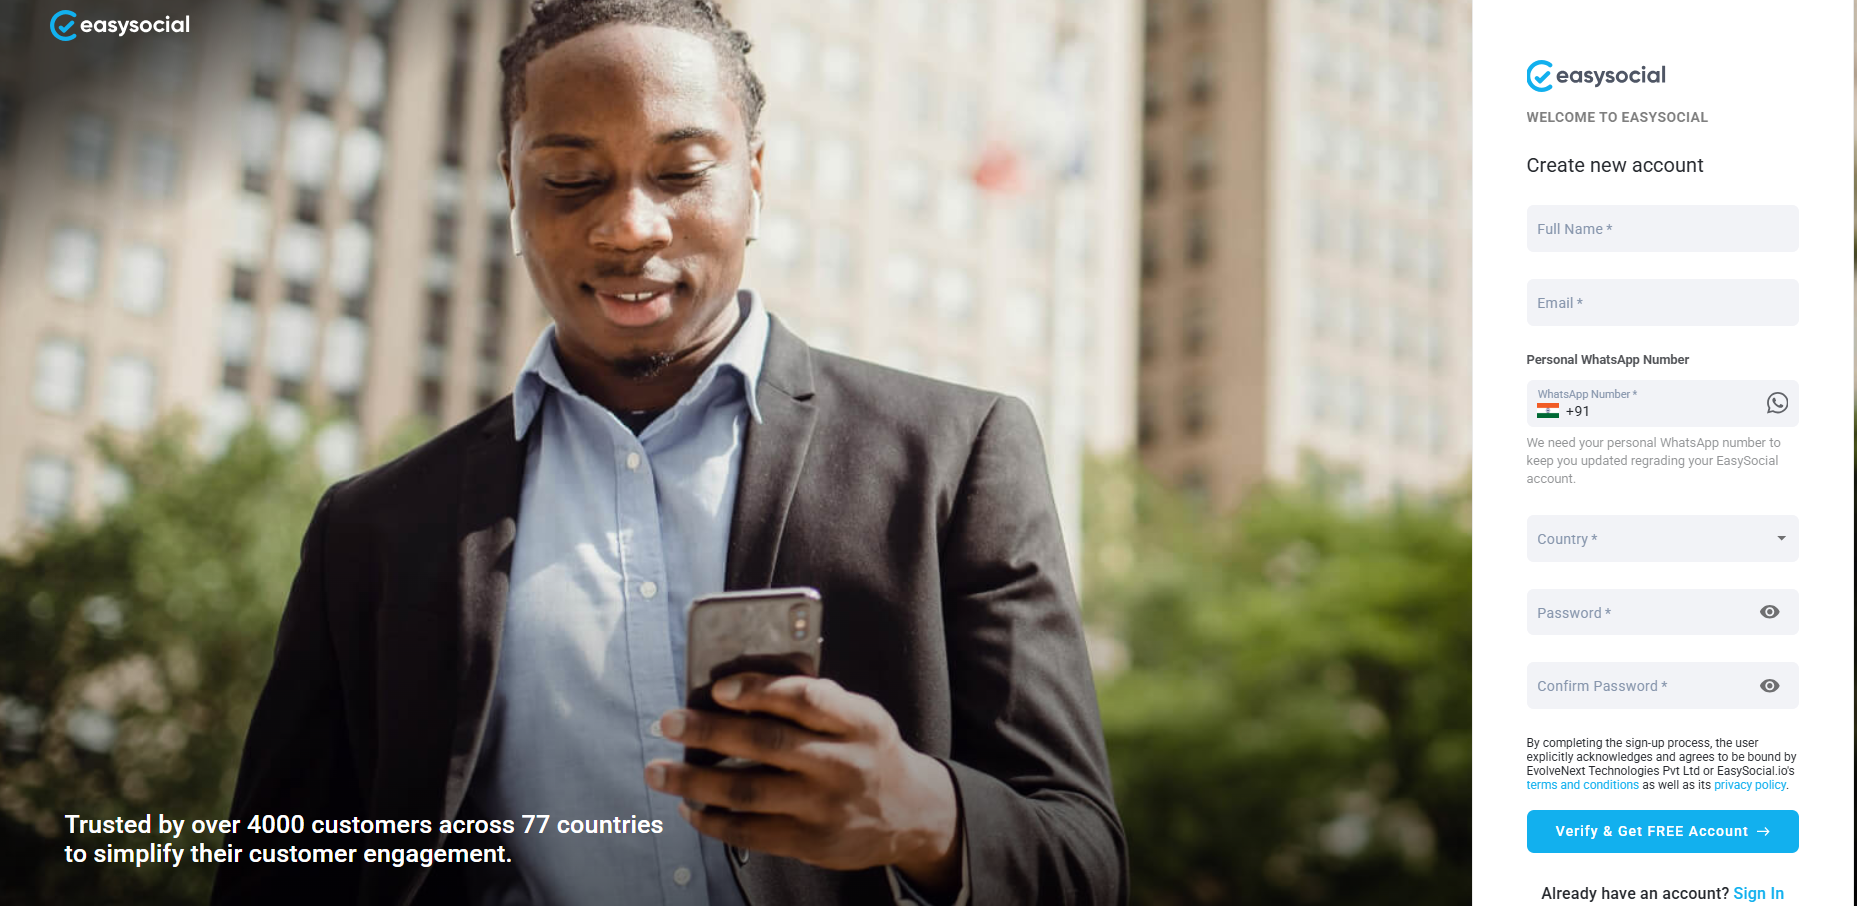
- Enter your details to Sign UP.
- Enter OTP and Verify.
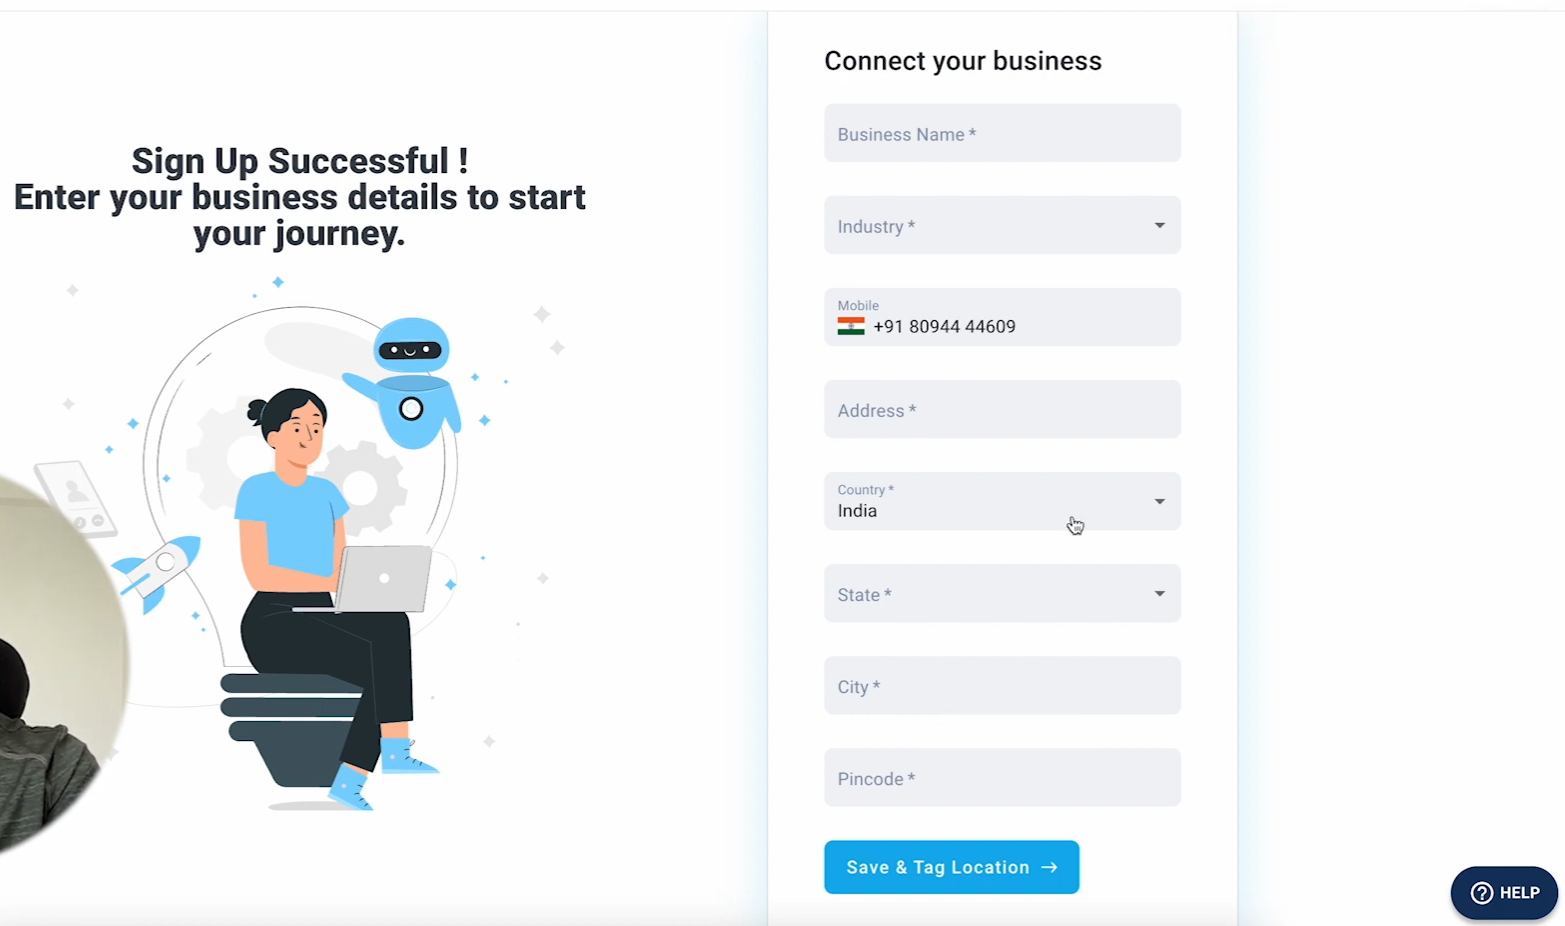
- Enter your Business Details.
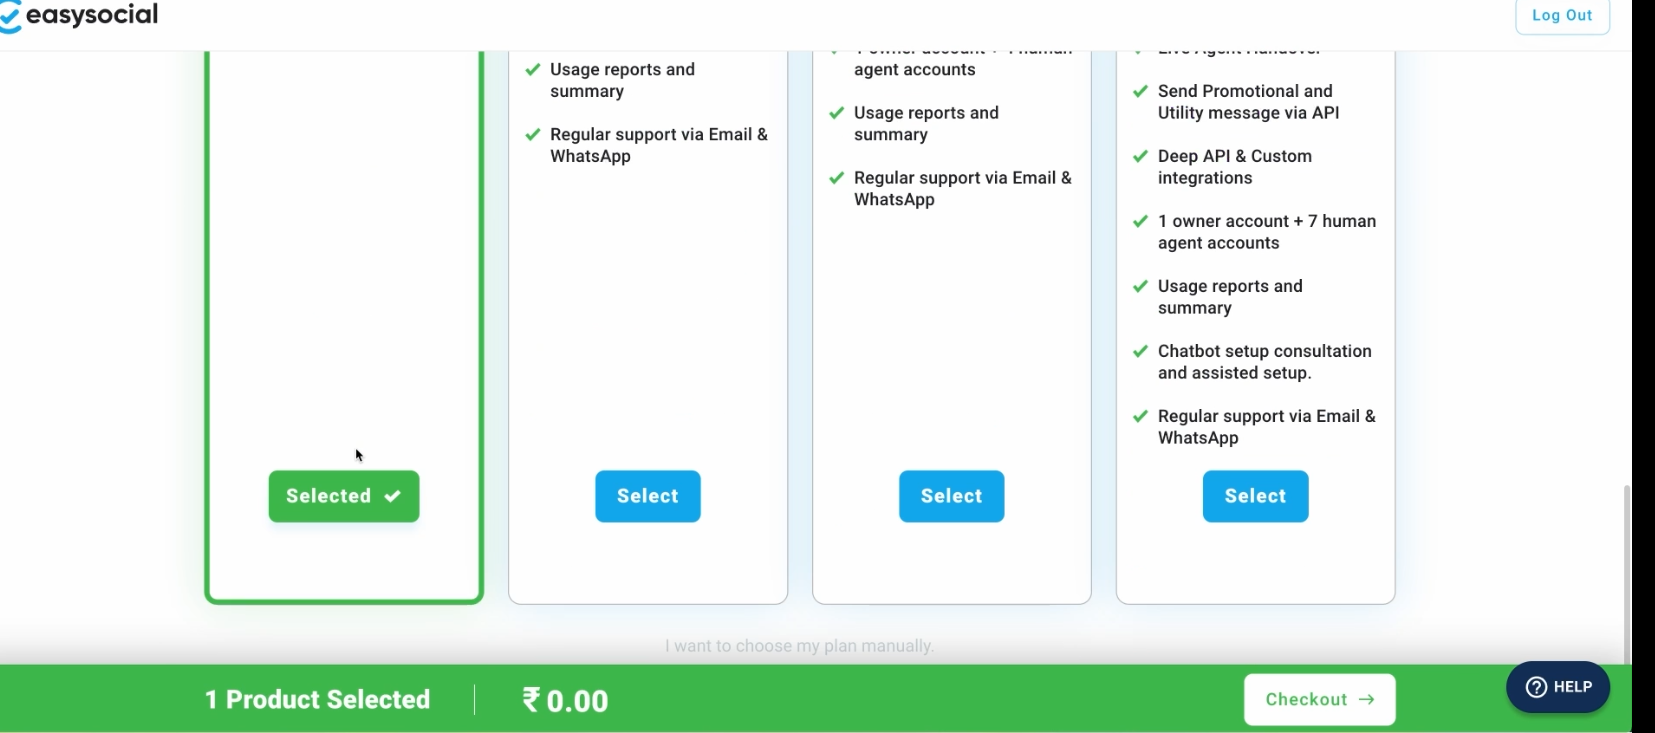
- Select your preferred plan (Free Plan to get started).
- Enter the Billing Details.
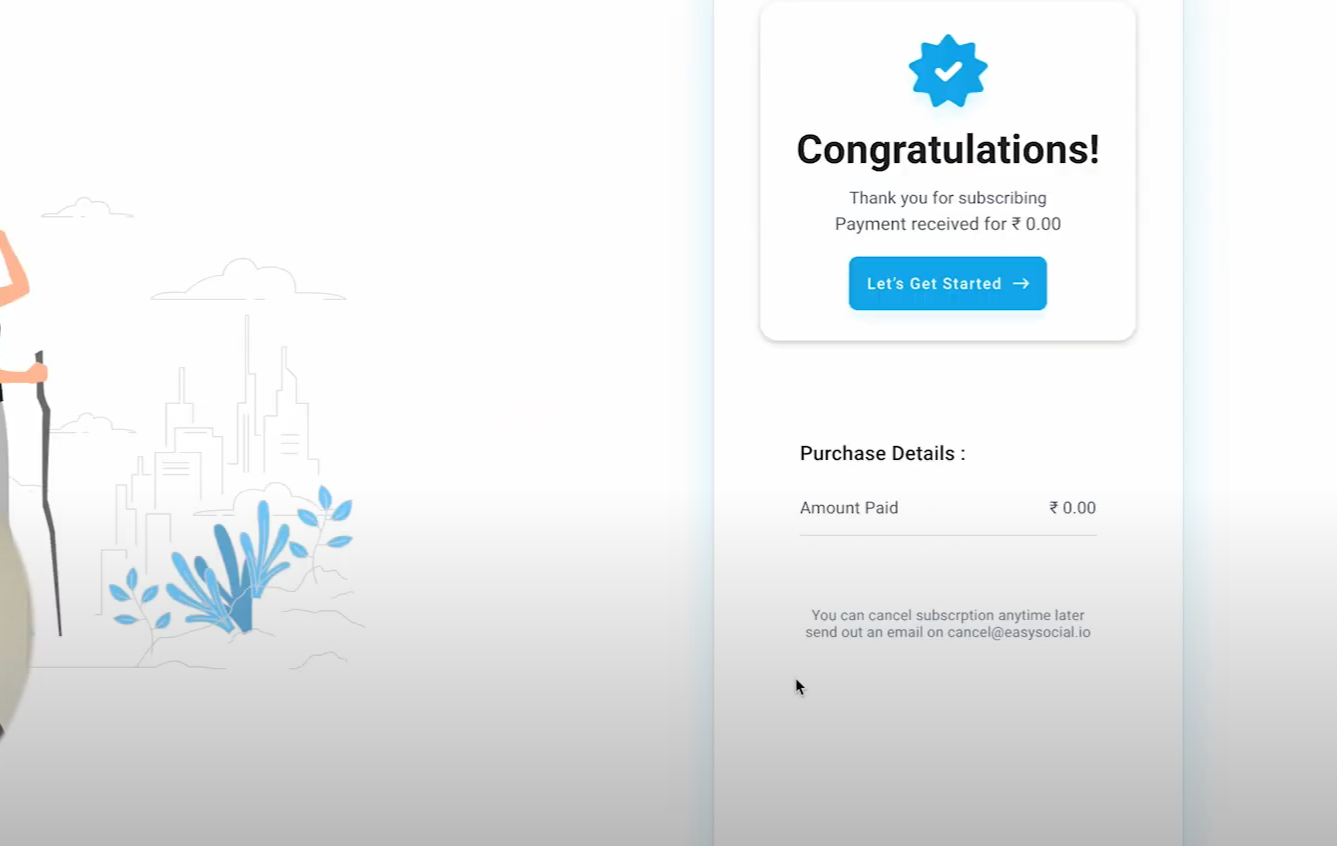
- Check Out the Summary.
- Click Let’s get started to complete the account creation process.
Step 2: Accessing WhatsApp API
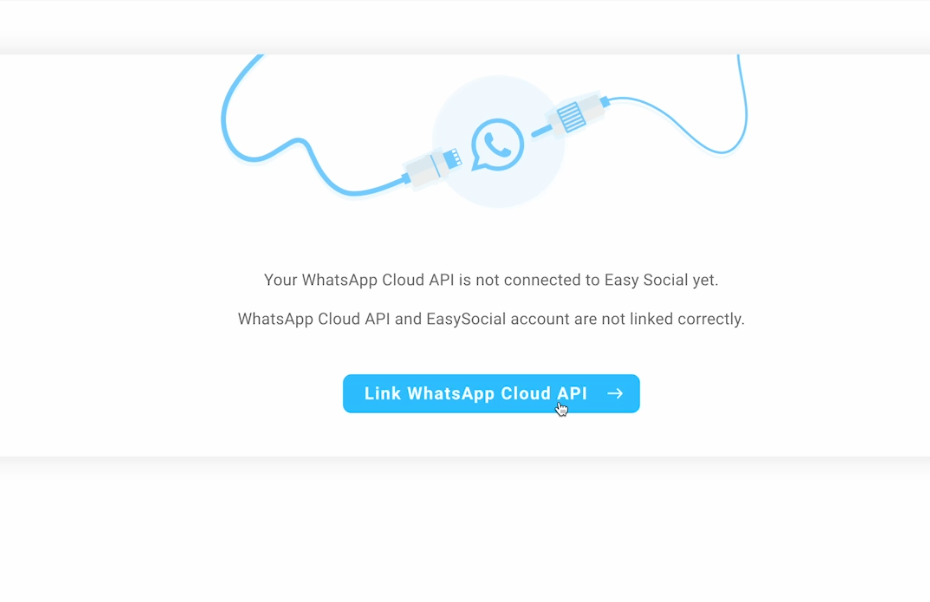
To use Easy Social’s features, you need access to WhatsApp API. Follow these instructions carefully:
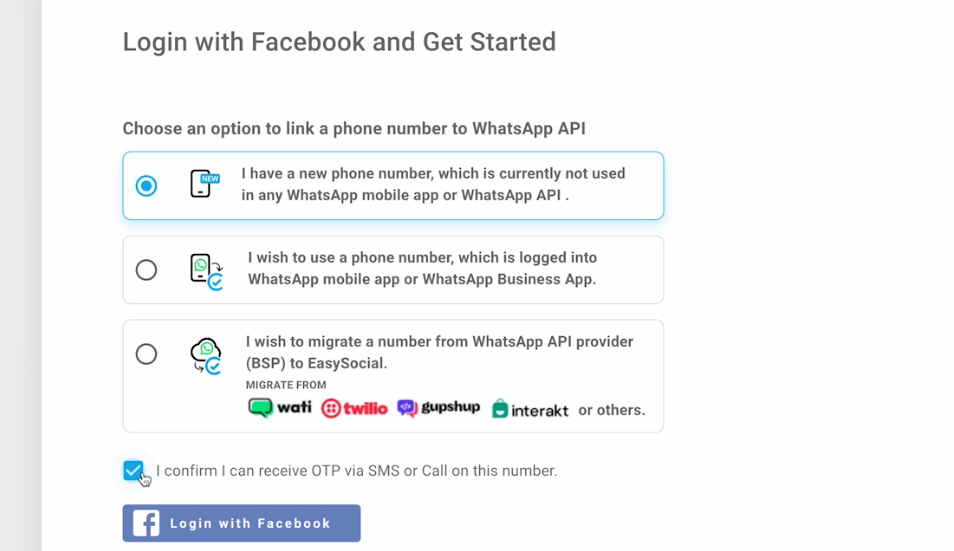
Step1: Login with Facebook
Choose the option for a New Number (make sure you have a number not linked to any WhatsApp account).
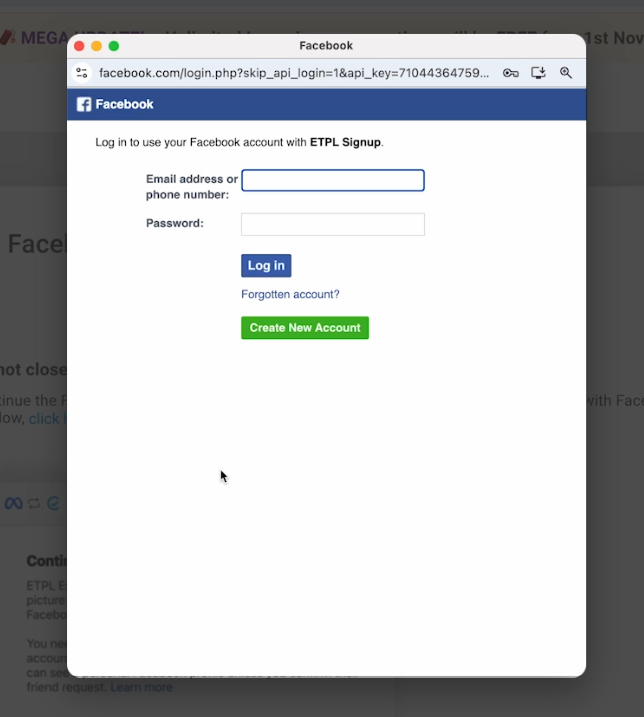
Click Login with Facebook.
Fill in the required details and continue with your account.
Grant the necessary permissions and click Get Started to link the account with EasySocial.
Step 2: Choose or Create a Business Portfolio
Select an existing business portfolio or create a new one.
Provide a Business Name, Website, and Country.
Click Next.
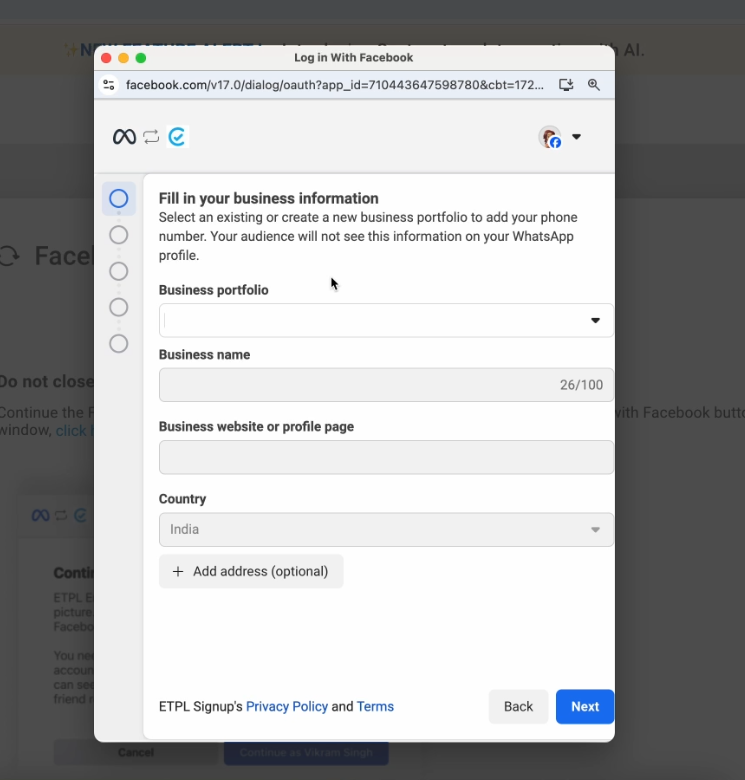
Step 3: Create a WhatsApp Business Account
Under "Choose the WhatsApp Business Account," select Create a New Account.
Also, create a new WhatsApp Business Profile.
Click Next.
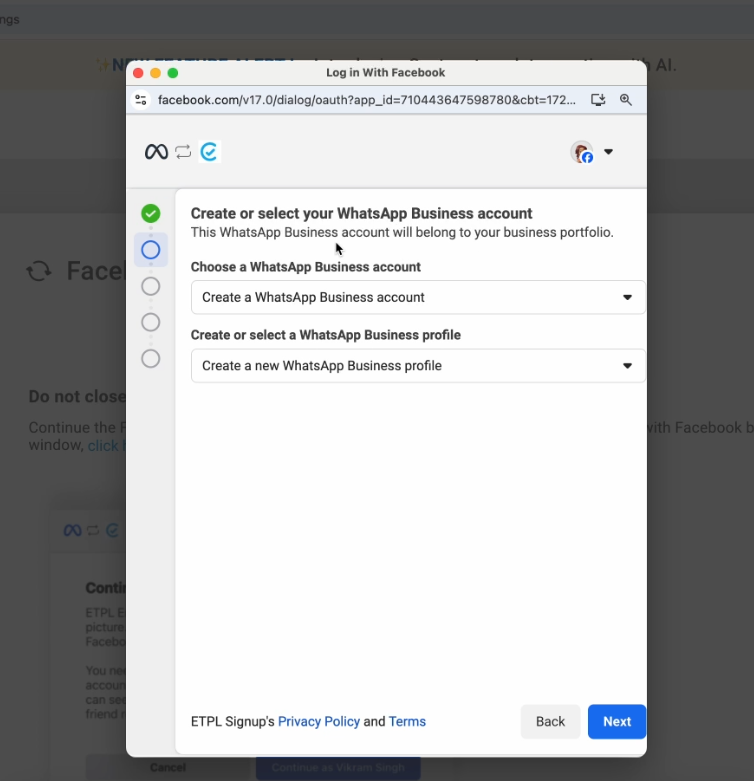
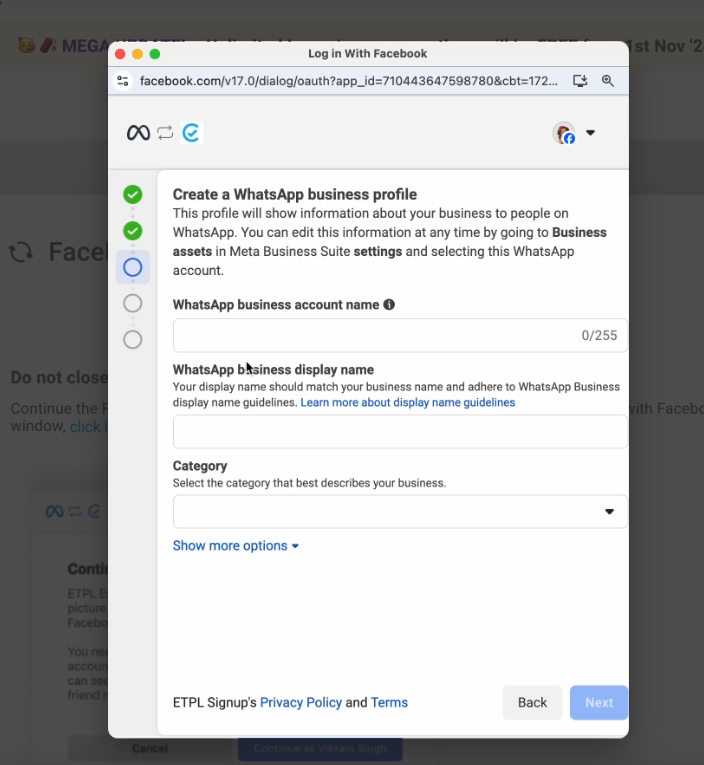
Step 4: Set Up Your WhatsApp Business Profile
Enter your Business Account Name.
Enter WhatsApp Business Display Name (This name will be displayed on your account).
Select the Category of your business.
Click Next.
Add your Phone Number and choose to Verify It.
Click Continue to review and grant the required access permissions.
Click Finish to finalize the setup.
You'll now see a Congratulations screen confirming that your WhatsApp Business API setup is complete.
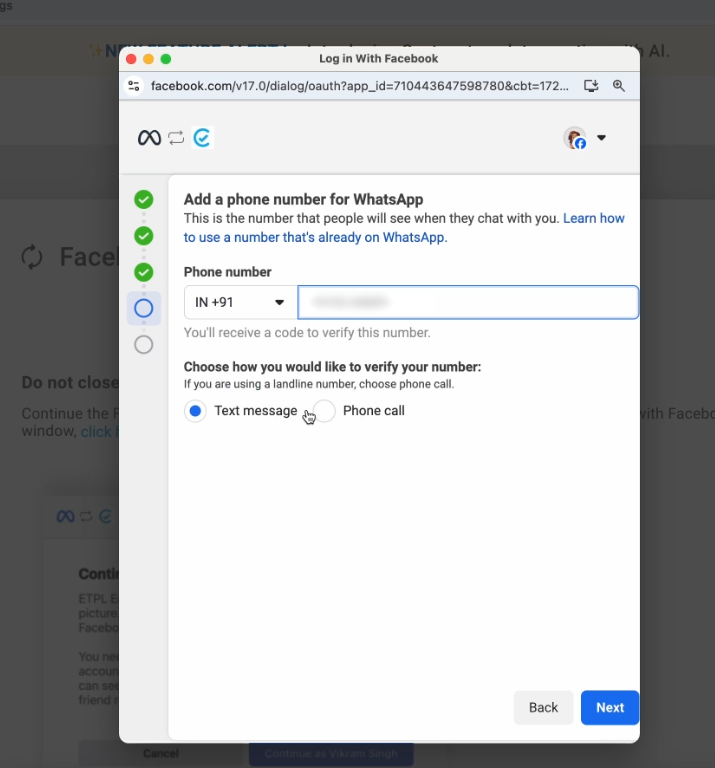
Step 5: Verify Your Business with Meta (Important Step!)
If you skip this step, you won’t be able to send messages. You must verify your business with Meta before proceeding. If your business is already verified, you can skip this step. Otherwise, follow these steps:
Go to Facebook Business Manager.
Navigate to Business Settings > Security Center.
Click on Start Verification and follow the on-screen instructions.
Provide the necessary business details and upload any required documents.
Submit your request and wait for approval from Meta.
Step 6: Link Payment Method
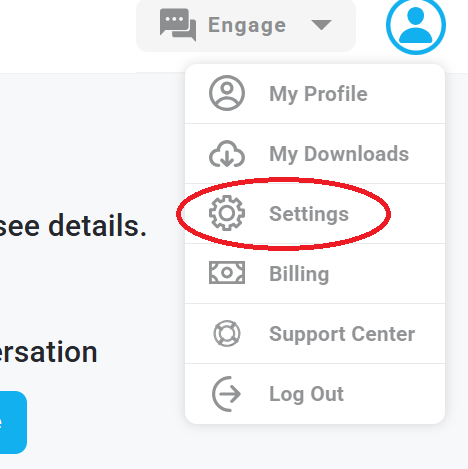
Click on the Profile Icon in the top-right corner on EasySocial.
From the drop-down menu, click on Settings.
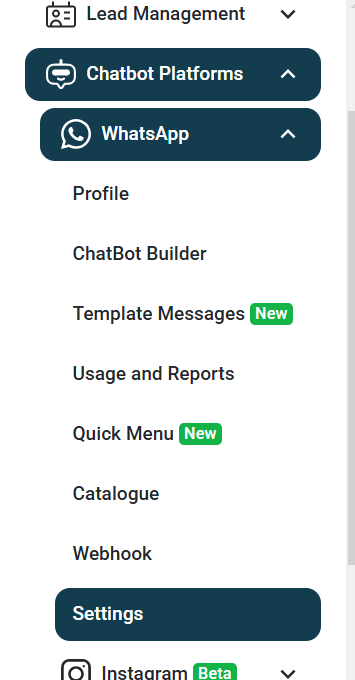
Go to Chatbot Platforms on the Left.
Click on WhatsApp, then select Settings.
Step 7: Add a Payment Method & Check Business Verification
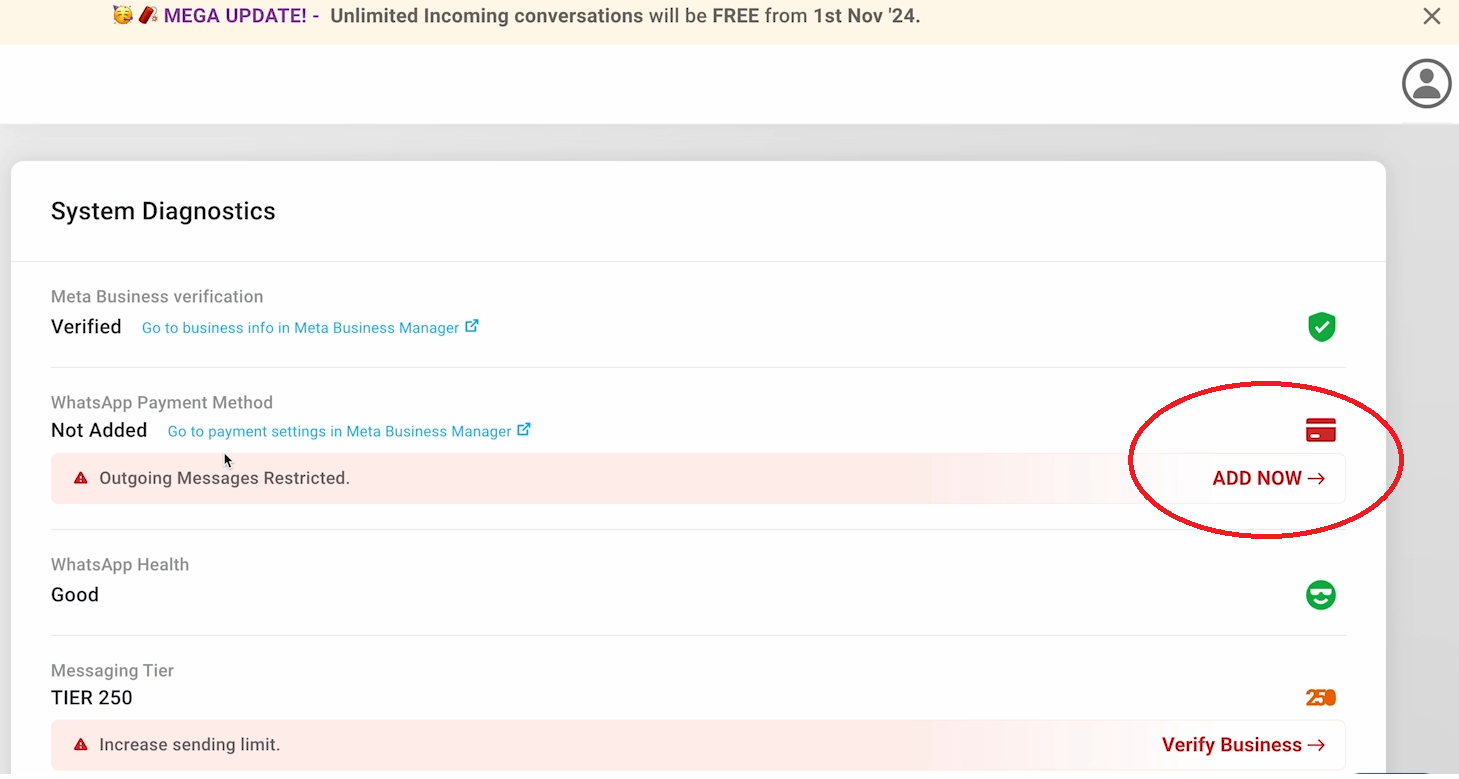
Click on Add Now to add a payment method.
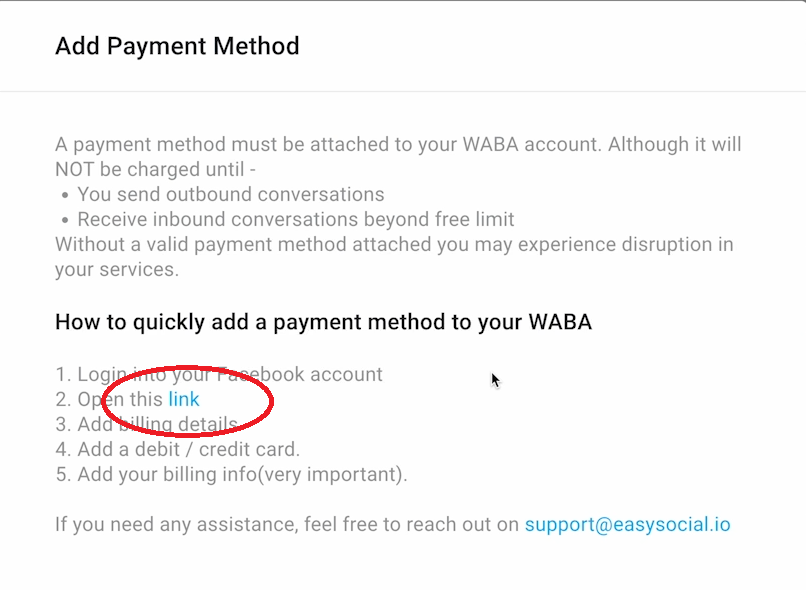
On the pop-up menu, click on Link.
On the Meta page, click on Add Payment Method.
Enter your Visa or MasterCard details to complete the setup.
After adding the payment method, check if your business is verified.
Once verified, your Easy Social account is fully set up and ready to send and broadcast messages.
As the payment method is verified, it is crucial to fill in the business information beneath it; otherwise, your API will not function.
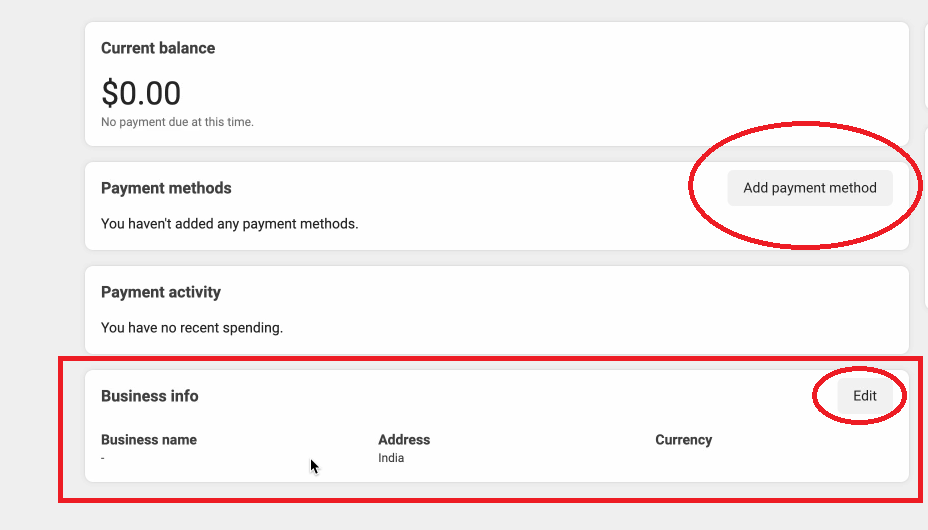
Once your business is verified and the payment method is set, you can proceed with managing your WhatsApp Business API effectively.
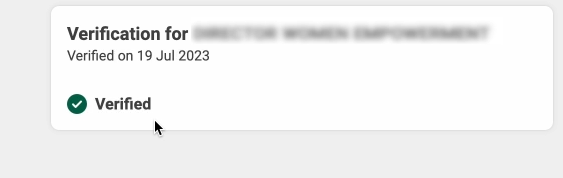
Now, you can start managing WhatsApp communications efficiently using Easy Social. If you encounter any issues, refer to Easy Social support or documentation for troubleshooting.
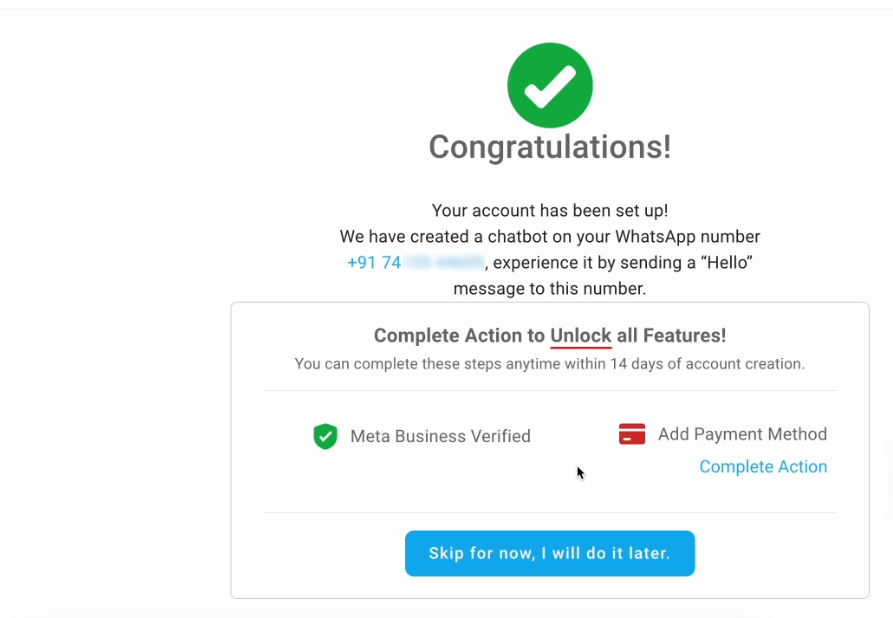
Conclusion
Easy Social makes integrating WhatsApp Business API simple and efficient. Following the above instructions will ensure a smooth setup, better customer engagement, and an overall enhanced business communication experience.